Chromadepth 3D Glasses Tutorial: Difference between revisions
mNo edit summary |
→Instructions (L3P v1.3): fix error |
||
| Line 68: | Line 68: | ||
<li>Now, search within the POV file for any other instances of a <tt>Color(n)</tt> texture being assigned to an object, and delete them. For example, if you find a line like this, delete it: | <li>Now, search within the POV file for any other instances of a <tt>Color(n)</tt> texture being assigned to an object, and delete them. For example, if you find a line like this, delete it: | ||
<pre> | <pre> | ||
#if (version >= 3.1) material #else texture #end { Color8 } | #if (version >= 3.1) material #else texture #end { Color8 } | ||
</pre></li> | </pre></li> | ||
</ol> | </ol> | ||
Revision as of 09:41, 21 February 2018
Warning! This article is a legacy article from the old site. It is provided for historical context and information may no longer be relavent.
This tutorial was written for L3P v1.3 and POV-Ray 3.6, and probably needs to be re-written for L3P v1.4 and POV-Ray 3.7. The basic principles still apply, however.
By: Michael Horvath (talk)
Introduction:
This tutorial describes how to render LDraw models so that they can be viewed in 3D using ChormaDepth polarized glasses. Before proceeding with this tutorial, you should already know how to build models using MLCad and convert them to POV-Ray format using L3P.
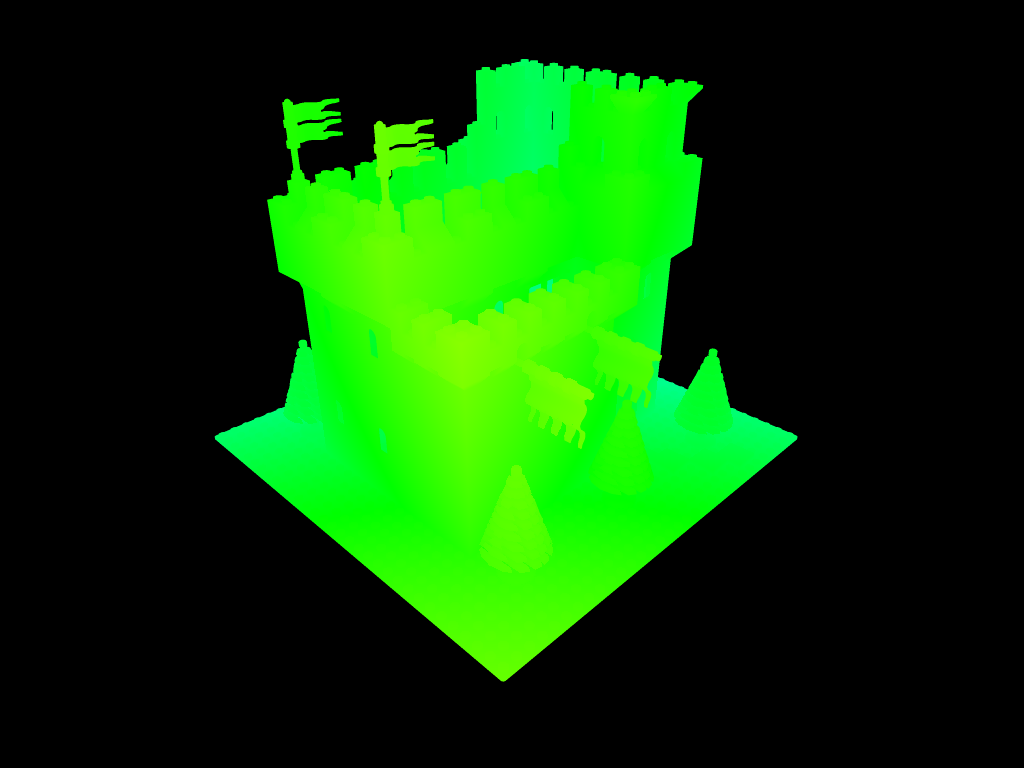
Polarized glasses are a type of glasses that affect depth-perception by intercepting light in such a way that two-dimensional images appear three-dimensional to the eye. The perceived depth depends on the wavelength of the reflected light; blueish colors appear to be distant, redder colors appear to be near, greener colors appear to lie somewhere in the middle.
One manufacturer of such glasses is ChromaTek. You can learn more about their glasses by visiting their website. For more information on polarized glasses in general, you can read the Open CyberHolographic Standard (also located at the ChromaTek website).
Instructions (L3P v1.3)
- Convert your MLCAD model to POV-Ray format using L3P. Open the POV file in POV-Ray. Search within the file for light source statements (they should be near the end of the file) and delete any that you encounter.
- Locate the camera statement. It should be just above the lights, before the background, and should look something like this:
// Camera (Latitude,Longitude,Radius = 30,45,-20) camera { #declare PCT = 20; // Percentage further away #declare STEREO = 0; // Normal view //#declare STEREO = degrees(atan2(1,12))/2; // Left view //#declare STEREO = -degrees(atan2(1,12))/2; // Right view location vaxis_rotate(<607.219,-575.974,-744.326> + PCT/100.0*<542.276,-442.766,-542.276>, <-240101,-588126,240101>, STEREO) sky -y right -4/3*x look_at <64.9436,-133.208,-202.05> angle 67.3801 } - Move the camera statement to the very top of the file, and insert the following code immediately after it:
#declare lookFrom = ; #declare lookAt = ; #declare ChromaMaterial = #if (version >= 3.1) material { #end texture { pigment { spherical color_map { #declare i_count = 0; #declare i_max = 240; #while (i_count <= i_max) [i_count/240 color rgb CHSL2RGB(<240 - i_count, 1, 1/2>)] #declare i_count = i_count + 1; #end } } finish {ambient 1} scale vlength(lookFrom - lookAt) * 2 translate lookFrom } #if (version >= 3.1) } #end - Look within the camera statement for the location and look_at keywords. Copy the part following the location keyword and paste it after the lookFrom keyword. Now, copy the part that follows the look_at keyword and paste it after the lookAt keyword. When you're done, it should look something like this:
 #declare lookFrom = vaxis_rotate(<607.219,-575.974,-744.326>
 				+ PCT/100.0*<542.276,-442.766,-542.276>,
 				<-240101,-588126,240101>, STEREO);
 #declare lookAt = <64.9436,-133.208,-202.05>;
- Search for the very last object statement. It should be near the end of the POV file, just before the background statement. If the name of your model file is "castle.ldr", then the object statement should look something like this:
object { castle #if (version >= 3.1) material #else texture #end { Color7 } } - Modify the code so that the ChromaMaterial material is used instead of Color(n). E.g.:
object { castle #if (version >= 3.1) material #else texture #end { ChromaMaterial } } - Now, search within the POV file for any other instances of a Color(n) texture being assigned to an object, and delete them. For example, if you find a line like this, delete it:
#if (version >= 3.1) material #else texture #end { Color8 }
You're finished! All you have to do now is render your image. The final rendered image should look something like this:
