Scaling Down: Difference between revisions
No edit summary |
No edit summary |
||
| Line 42: | Line 42: | ||
==Design with 3D CAD== | ==Design with 3D CAD== | ||
I normally use Michael Lachmann's | I normally use Michael Lachmann's [[MLCad]] to design the 3D model, and Travis Cobbs [[LDview]] as a viewer. MLCad is really simple and user friendly and includes easy submodel management to build complex models. This feature is also useful for controlling the building sequences. During the design stage I usually add building steps and the required view rotation steps immediately to better identify the working area, but I keep the submodels in alphabetic order. I then sort them to their correct building sequence only at the very end. | ||
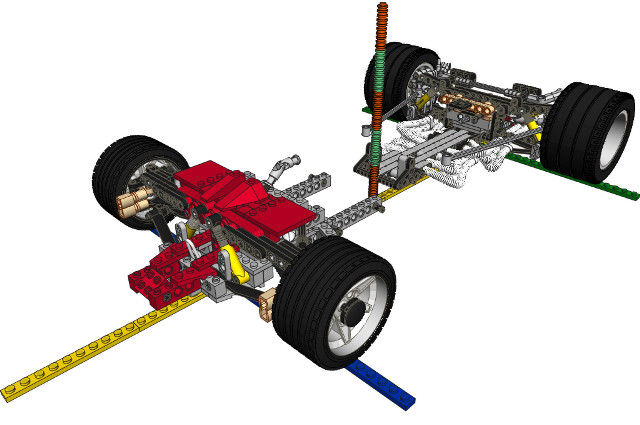
The first submodel I prepare is always the one including the '''reference axis''': it's basically a framework of 1x10 plates representing the car's longitudinal axis (yellow) plus the front (blue) and rear axis (green), identifying the wheelbase. 1x10 plates are useful to measure the distances calculated in studs with the Excel spreadsheet. The same plates also represent the ground level where the tyres are positioned. I also add a small column made of 1x1 round plates changing colours after every 10 plates, to measure the vertical elevation of the components. | The first submodel I prepare is always the one including the '''reference axis''': it's basically a framework of 1x10 plates representing the car's longitudinal axis (yellow) plus the front (blue) and rear axis (green), identifying the wheelbase. 1x10 plates are useful to measure the distances calculated in studs with the Excel spreadsheet. The same plates also represent the ground level where the tyres are positioned. I also add a small column made of 1x1 round plates changing colours after every 10 plates, to measure the vertical elevation of the components. | ||
| Line 66: | Line 66: | ||
[[file:18_susp_rear_49B.jpeg]] | [[file:18_susp_rear_49B.jpeg]] | ||
When present, I also reproduce the | When present, I also reproduce the '''stabilizer rods''' (anti roll bars) with the proper shape, as well as many other technical details like brake discs, brake cooling systems and air intakes, radiators and pipes, etc. | ||
[[file:19_rear_view_312T_real.jpeg]] | [[file:19_rear_view_312T_real.jpeg]] | ||
| Line 83: | Line 83: | ||
[[file:24_engine_8V.jpeg]] | [[file:24_engine_8V.jpeg]] | ||
'''Exhaust pipes''' are obviously related to the number of cylinders, and their routing is sometimes very complex: in MLCad they can be designed using Kevin Clague's | '''Exhaust pipes''' are obviously related to the number of cylinders, and their routing is sometimes very complex: in MLCad they can be designed using Kevin Clague's [[LSynth]]. It takes some time to become skilled in placing LSynth's constraint parts, but with a reasonable number of attempts you can succeed in getting a double 3 in 1 configuration (white hoses) or even nice 4 in 1 mufflers (black hoses). | ||
[[file:25_exhaust6_cyl.jpeg]] | [[file:25_exhaust6_cyl.jpeg]] | ||
| Line 98: | Line 98: | ||
==Tips and tricks== | ==Tips and tricks== | ||
Here are some building suggestions for | Here are some building suggestions for MLCad that I've worked out designing my models. | ||
I usually group all those parts that will be rotated as a group into submodels, since modifications can be easily applied to submodels using the standard perpendicular reference axis XYZ. MLCad includes those changes in the main model without any problem! In the following example the front wing is a submodel that can be freely rotated towards the car's front nose. With this approach it's sufficient to properly select the rotation point (using the relevant button) as a ''custom'' point and it will be recognized in the main model as the rotation point for the whole submodel. | I usually group all those parts that will be rotated as a group into submodels, since modifications can be easily applied to submodels using the standard perpendicular reference axis XYZ. MLCad includes those changes in the main model without any problem! In the following example the front wing is a submodel that can be freely rotated towards the car's front nose. With this approach it's sufficient to properly select the rotation point (using the relevant button) as a ''custom'' point and it will be recognized in the main model as the rotation point for the whole submodel. | ||
Latest revision as of 08:05, 17 December 2011
Introduction
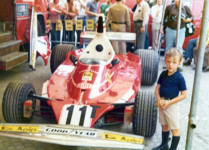
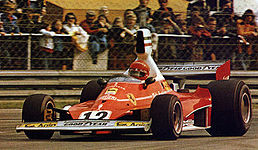
In September 1975, during the Saturday qualifying session of the Italian GP, Niki Lauda set the pole position with his Ferrari 312T in front of team-mate Regazzoni. I was very excited when my father told me that the Monza circuit was not so far from home. I insisted until he drove me there! When we arrived at the circuit the crowd was already gone. I started screaming at the fences of the pit lane pretending to take a look at the race cars. Luckily enough a Ferrari engineer came by and took my hand to visit the garage: it was my first and closest contact with a real Formula 1 car. A car that was going to win the World Championship the very next day.
Though my passion for race cars nowadays is quite moderate, I soon tried to build Formula 1 car once I came out of my dark age: first modifying some original LEGO Technic models, then focusing on the details like a modeller trying to work out new and original creations. My building approach has changed a lot compared to the one I used in my childhood: the usual shortage of time and space forces me to study and design the entire model before I start building, drastically reducing any improvisation. I was lucky when I discovered some dedicated 3D CAD software including comprehensive parts libraries and other useful design tools for renderings and building instructions. Before that, I was studying different building solutions using MS Excel!
Select the subject
It's difficult to see and appreciate original solutions or strong personality and good design in today's Formula 1 cars. Every little thing has been designed in the wind tunnel, and the body is covered by tons of wings, winglets, baffles, fins, etc. My personal opinion is that they are now really similar to each other. Thus I prefer old cars that made the history of the Formula 1 and became milestones by introducing reference technical solutions for subsequent years; those are very popular cars, not only among F1 fans.
Collecting pics and data
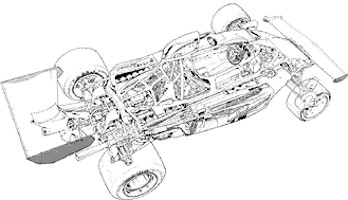
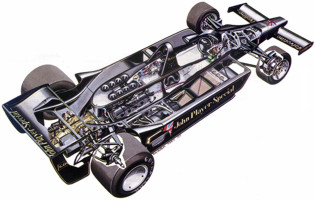
Once I've selected the model to reproduce, the first action is collecting all available information about the real car. Since we are talking about Formula 1, it's quite easy to find pictures and videos on the web, while it's much harder to get your hands on details hidden underneath the bodywork: official information about the chassis dimensions, the shape and geometry of the suspensions, the engine configuration, etc. Few of the biggest and most glorious cars manufacturers of the past are still present in Formula 1 or have an official website and often you can find different and conflicting information even in books. Nonetheless, gathering technical data and drawings is a MUST to properly proceed with the design.
Fixing the scale
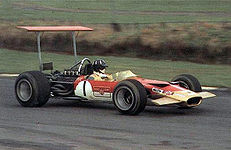
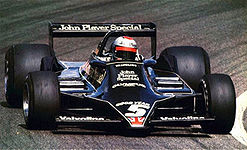
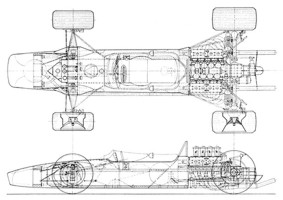
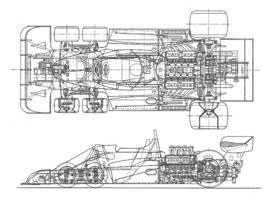
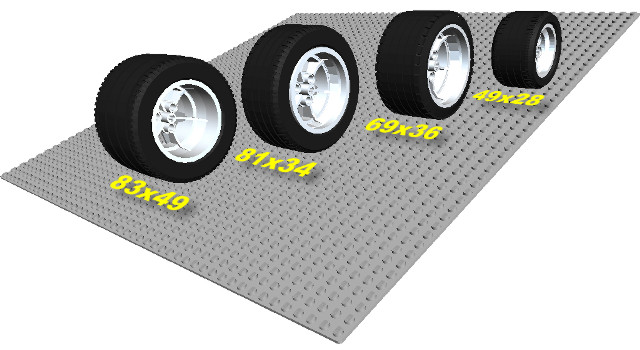
Building a model with LEGO is fun, but you always have to consider the limited number of existing parts. Most critical are the dimensions of available tyres and rims: those normally define the final scale of the model! Obviously it's also important to decide the minimum level of detail you want to implement: I prefer my cars to have working steering wheels, front and rear suspensions with shock absorbers, transmission up to the crankshaft, anti roll bars and other main features (e.g. the skirts on the Lotus 79). In order to fix the overall model scale I normally print out (possibly in A3 format) a drawing with both plan and side views and compare it with official known data (typically wheelbase, front and rear tracks, height, width, etc.) I calculate the scale from the drawing itself and therefore evaluate with a good confidence and accuracy the dimensions of all the other minor details. Often I take inspiration and information also from the instruction manuals of modeller sets.
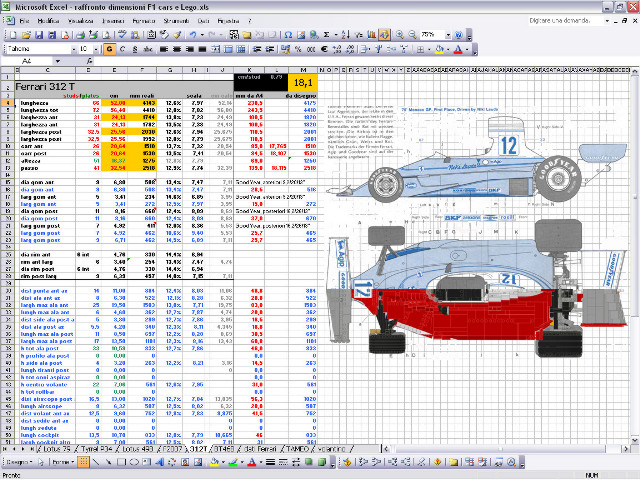
I then use a dedicated MS Excel spreadsheet to compare all the dimensions derived from the drawing and those of the real car with the planned LEGO model.
During the design stage I further like to superimpose the LEGO CAD snapshot over the original reference drawing to verify the final result and the accuracy of the overall proportions. Since the model dimensions are evaluated directly in stud units, the expected precision must be less than half a stud! The minimum scale to build a model with all the required details is about 1:10, but since there are few big LEGO rubber tyres available and they control the overall size, the scale is typically between 1:7 and 1:8.
Design with 3D CAD
I normally use Michael Lachmann's MLCad to design the 3D model, and Travis Cobbs LDview as a viewer. MLCad is really simple and user friendly and includes easy submodel management to build complex models. This feature is also useful for controlling the building sequences. During the design stage I usually add building steps and the required view rotation steps immediately to better identify the working area, but I keep the submodels in alphabetic order. I then sort them to their correct building sequence only at the very end.
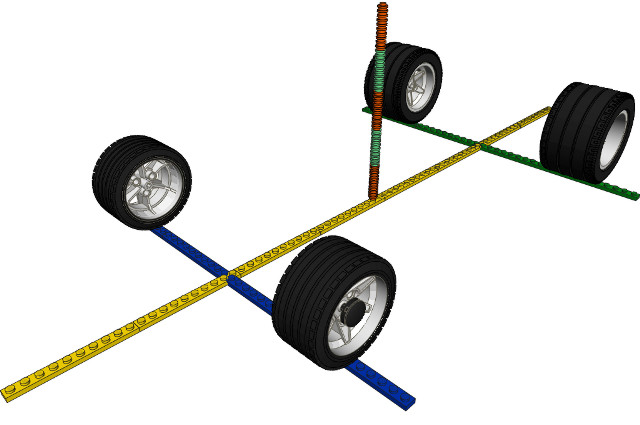
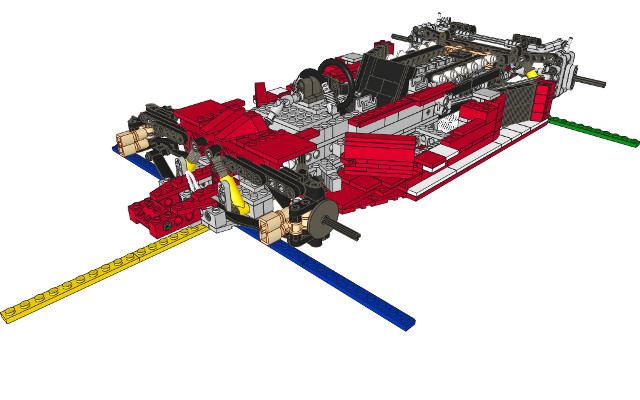
The first submodel I prepare is always the one including the reference axis: it's basically a framework of 1x10 plates representing the car's longitudinal axis (yellow) plus the front (blue) and rear axis (green), identifying the wheelbase. 1x10 plates are useful to measure the distances calculated in studs with the Excel spreadsheet. The same plates also represent the ground level where the tyres are positioned. I also add a small column made of 1x1 round plates changing colours after every 10 plates, to measure the vertical elevation of the components.
Once I've positioned the selected tyres with the relevant track distance and wheelbase, I'm ready to start with the rest of the model.
Chassis and suspensions are designed concurrently to better reproduce the geometry and functionality of the original suspension.
For the rear suspension I start from a compact solution including the differential and transmission, with a gear ratio greater than 1 to increase the crankshaft rotation speed, as there's no way to find the room for a working gearbox. This solution ensures that the distance between engine and rear axel is minimized.
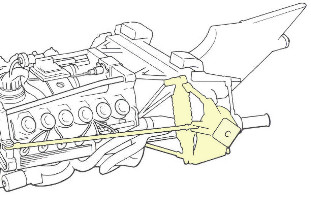
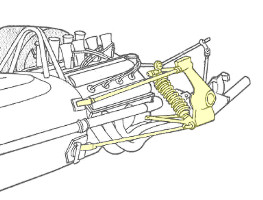
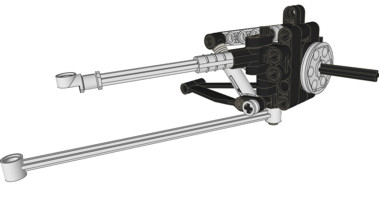
The geometry of the rear suspension is always taken from pictures and drawings of the real cars. The number, shape and position of the rocking arms or links may vary, both for the upper and lower ones, as well as the location of the connecting points.
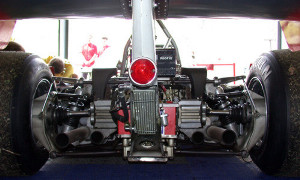
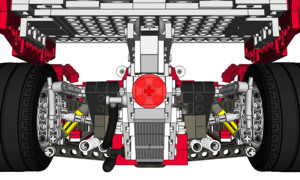
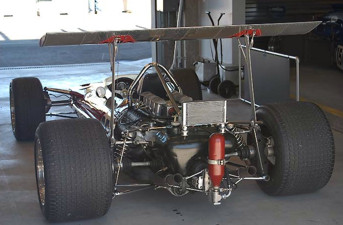
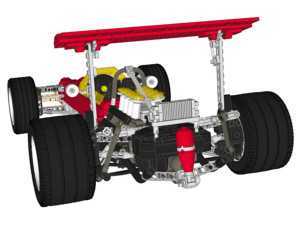
When present, I also reproduce the stabilizer rods (anti roll bars) with the proper shape, as well as many other technical details like brake discs, brake cooling systems and air intakes, radiators and pipes, etc.
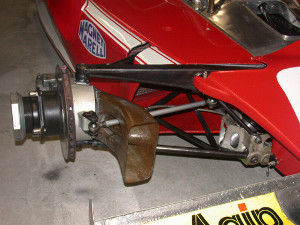
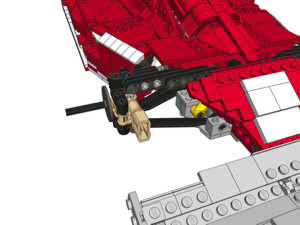
The front suspension includes the steering system, with rack and pinion gear. Simple and compact uprights are often enhanced with brake discs and relevant air intakes.
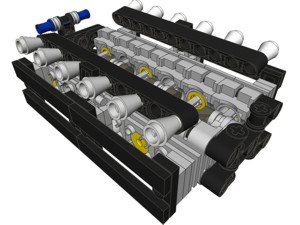
The engine is the "heart" of a race car: while today the number of cylinders and the engine configuration are both fixed by technical regulations, in the past those parameters were free and therefore very important for the main technical choices of the designers and manufacturers!
So, while Ferrari used a flat 12 cylinder engine during most of the '70s, many teams in the UK were devoted to the long lived and reliable V8 Cosworth DFV.
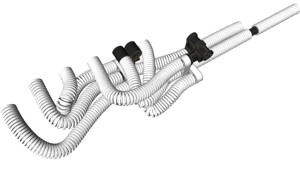
Exhaust pipes are obviously related to the number of cylinders, and their routing is sometimes very complex: in MLCad they can be designed using Kevin Clague's LSynth. It takes some time to become skilled in placing LSynth's constraint parts, but with a reasonable number of attempts you can succeed in getting a double 3 in 1 configuration (white hoses) or even nice 4 in 1 mufflers (black hoses).
It's a shame to hide the car's chassis, the suspension, the engine, the radiators and all the rest underneath the bodywork, but I consider the model completed only when the aesthetics are as close as possible to the original.
Step by step I place all the parts of the bodywork in position: the nose, the front wing, the lateral air intakes, the openings for the hot air coming from the front radiators, the winglets close to the rear wheels, and finally the cockpit, the main upper airscope, the rear wing and its support.
Tips and tricks
Here are some building suggestions for MLCad that I've worked out designing my models.
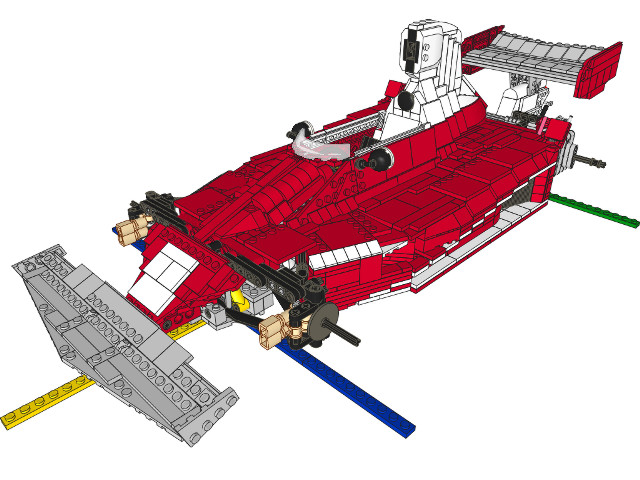
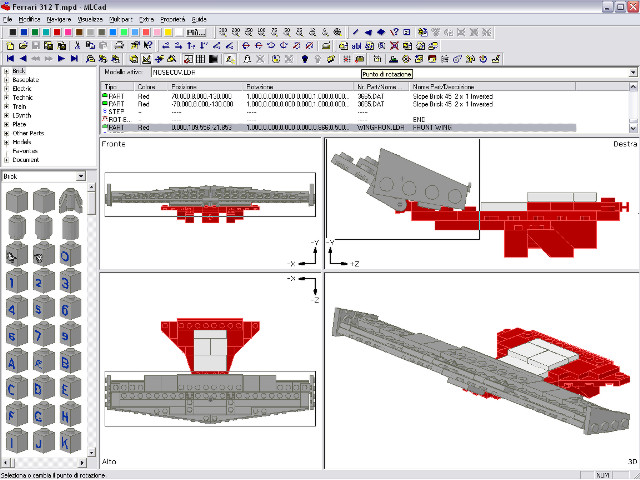
I usually group all those parts that will be rotated as a group into submodels, since modifications can be easily applied to submodels using the standard perpendicular reference axis XYZ. MLCad includes those changes in the main model without any problem! In the following example the front wing is a submodel that can be freely rotated towards the car's front nose. With this approach it's sufficient to properly select the rotation point (using the relevant button) as a custom point and it will be recognized in the main model as the rotation point for the whole submodel.
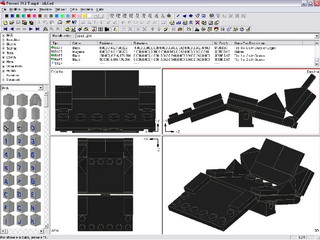
There are 3 different type of grids for rotations and displacements in MLCad's settings: coarse, medium and fine. For the best result, especially when the rotation of big submodels is involved, I suggest to use a fine rotation angle of only 0.5 degree as shown in the following table. This value is useful also for matching the typical 22.5 degree angle of many Technic connectors and new hinges.
Using submodels is also useful to implement SNOT techniques (Studs Not On Top), where the parts are not arranged in the standard vertical position. This allows one to obtain nice results and interesting studless solutions.
All in all I can share the attention to details and proportions not just with Formula 1 addicts, who are able to appreciate the accuracy of my models, but have no idea about the challenge of building it with LEGO parts. Likewise AFOLs, who may value some building techniques, but ignore the importance of the car's peculiarities...
External Links
my Ferrari 312T brickshelf folder
my Lotus 49B brickshelf folder

